Yanfly Engine Plugins is a plugin library made for RPG Maker MV, a wonderful piece of software to help you make that role playing game of your dreams. You can find out more about RPG Maker MV here.
You can grab the plugin here:
English Mirror
This plugin allows you to set custom cursors when selecting allies and/or enemies for targeting while in battle. This is to help with better visual cues when picking a target if the flashing battler isn’t enough.
Introduction
Please wait while you are redirected...or Click Here if you do not want to wait.
This plugin allows you to set custom cursors when selecting allies and/or enemies for targeting while in battle. This is to help with better visual cues when picking a target if the flashing battler isn’t enough.
Instructions – Cursor Filenames
Save your cursor into your game project’s img/pictures folder. This will be where your project will get all of its pictures from.
The filename plays an important role in the way the cursors work. It will be used to determine the number of frames used by the cursor. It will work in the following format:
filename_WidthxHeight
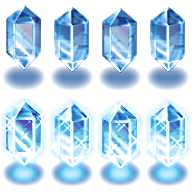
Therefore, when using ‘Crystal_Blue_4x2’, it means there will be 4 frames usable from left to right and 2 frames usable from top to bottom. It will have a width of 4 frames and a height of 2.
If the format isn’t used, then the dimensions will default to 1×1.
Notetags
You can use the following notetags to adjust the cursor settings for your actors and enemies.
Actor and Enemy Notetags:
<Battle Select Cursor: filename>
– This will change the filename of the cursor image used for this actor or enemy when selected. The same rules apply as the ones listed in the Instructions – Cursor Filenames section of the help file.
<Battle Select Cursor Anchor X: Left>
<Battle Select Cursor Anchor X: Center>
<Battle Select Cursor Anchor X: Right>
<Battle Select Cursor Anchor Y: Top>
<Battle Select Cursor Anchor Y: Middle>
<Battle Select Cursor Anchor Y: Bottom>
– These notetags determine where the origin point of the cursor sprite should be.
<Battle Select Cursor Positon X: Left>
<Battle Select Cursor Positon X: Center>
<Battle Select Cursor Positon X: Right>
<Battle Select Cursor Positon Y: Top>
<Battle Select Cursor Positon Y: Middle>
<Battle Select Cursor Positon Y: Bottom>
– These notetags determine where the select cursor will appear on the actor or enemy when targeting them.
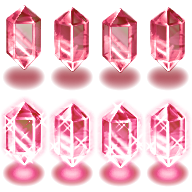
Sample Cursors
For those who’d like some sample cursors to use, you can download these. Place them inside of your project’s /img/pictures/ folder.
Happy RPG Making!